Tuesday, August 27, 2013

Lengua de Gato Cookies

As far as I remember, there were only a few cookie varieties being sold at my aunts' bakeshop before.  They specialized mainly on pastries.  However, especially during the Christmas season, the cookie orders were abundant.  I can still picture those plastic jars with yellow lids on the bakeshop counter in my mind.  I cannot imagine how my aunts managed to press, pipe, bake and pack all those cookies!

If I am not wrong, their bestsellers then were the spritz, arrowroot and lengua de gato (cat's tongue) cookies.  As I have been in cookie-making mode lately, I decided to give these cookies (using the bakeshop recipes) a go one by one.

Spritz
Arrowroot
I loved making these two using the KitchenAid cookie press I recently bought from Costco for only $14!

Yesterday, as I had a cup of eggwhites stored in the freezer, I excitedly tried making the lengua de gato cookies.  These are Filipino butter cookies but considering how it's called, it's probably of Spanish origin.


Since these cookies are very thin and light, I kept on "testing" them after every tray came out of the oven.  I don't know just how much I ate but I had to skip lunch as I was already full!

Before I share the recipe, just a last note.  I tried using baking paper and silpat to line my baking trays and also tried putting the cookie dough straight onto non-stick baking trays (without lining).  The resulting cookies had different looks.


As seen from the photo above, I had the best results with the silpat-lined.  The cookies had straight edges.  The ones baked in baking paper all had wonky edges while the ones baked with no liner spread and browned more but were still as easy to remove.  Taste and crunchiness were the same for all. 

Here now is the lengua de gato cookies recipe so next time you have leftover eggwhites, you would know what to do with them.  

LENGUA DE GATO COOKIES (makes 300+ pieces)

Ingredients:
2 cups (4 sticks, 1 pound, 454 grams) salted butter, softened
2 1/4 cups white sugar
1 cup eggwhites
1 teaspoon vanilla extract
1 teaspoon orange flavouring
3 1/2 cups cake flour

Preheat oven to 160 degrees C (325F).  Line baking trays with baking paper or silicone mats.

In a large mixing bowl, using an electric mixer at high speed, cream butter and sugar until light and fluffy.

Lower mixer speed to medium then add eggwhites gradually followed by the vanilla and orange flavourings.  

Slowly mix in the flour.  Beat until everything is well combined and batter is smooth.

Fit a piping bag with a plain round or star tip (#12 or #21).  Spoon cookie batter into the piping bag.

Pipe out thin strips of batter onto lined baking trays, about 3 inches long and 1 1/2 inches apart.


Bake for about 15 minutes or until the cookie edges start to brown.

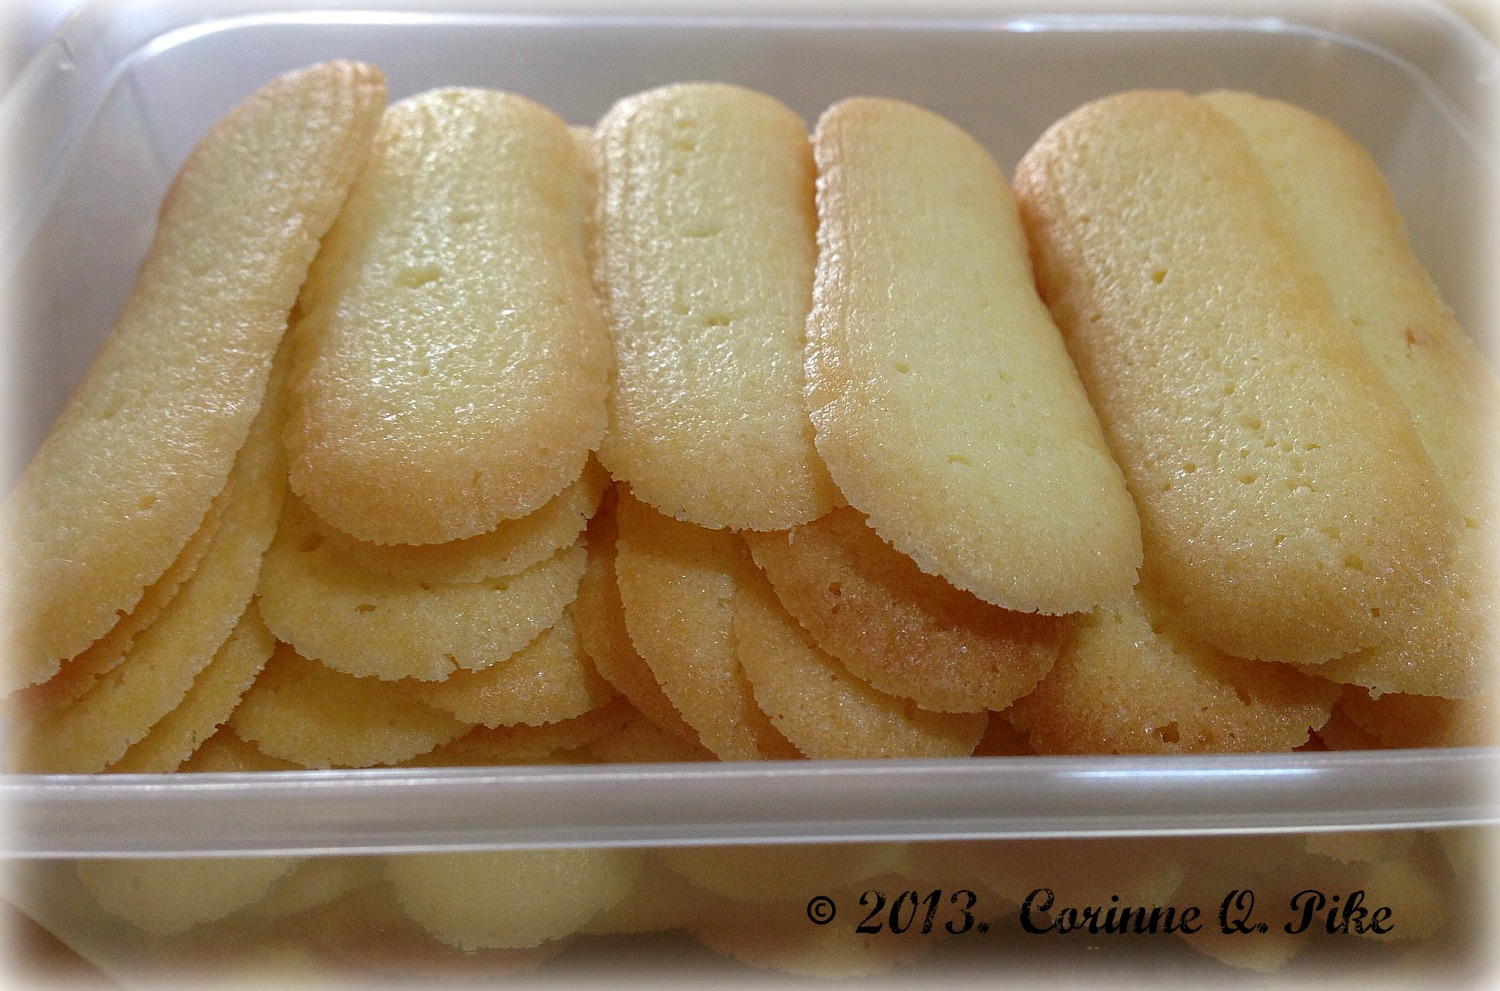
Loosen cookies from the trays while still warm.  When completely cool, pack them in airtight containers.

Enjoy!

Saturday, August 17, 2013

World Vision's 40-Hour Famine

This is not baking or sewing related but is of much more significance so please read on.


40 Hour Famine is one of Australia’s biggest youth events, raising community awareness and much-needed funds to help fight global hunger.  This year the fundraising will help support projects that fight hunger in Malawi, Ethiopia, East Timor, Nepal, Tanzania, and Uganda and helps World Vision respond to emergencies and other needs around the world.  You can read more about it on World Vision's website here.

For the first time, my 16-year old daughter Marie (or Missy, as we call her at home) is doing the 40-hour famine this weekend with some of her friends.  They have chosen to give up food from Friday night to Sunday lunch to experience, even for a while, how it is to go hungry.  I personally think this is something very powerful and meaningful to do, especially for the youth of today.

If you would like to donate, you can do so by going to Marie's fundraising page, the Hungry Hungry Hippos. Any amount, big or small, will be be much appreciated! $40 can actually help feed a family of six for a month!

Donations can be made online till the end of September. Thank you in advance for your generosity!

Sunday, August 4, 2013

The Frosted Heaven eBook is here!

Someone once told me that the recipes on this blog make Filipinos all over the world "closer to home".  Isn't that such a nice thing to know?  When I first posted the Ube Macapuno cake recipe, I never expected such a huge response.  That inspired me to post more recipes.  I have lost count of how many people I have corresponded with because of the recipes - some had one-off questions but some had gone further and formed friendships with me, even just through constant exchanges of emails.

Not too long ago, I took a break from selling cakes.  In my down time, I thought of working on compiling my recipes into a book.  As it is, I have a lot of my recipes scribbled in different sheets, scattered in different parts of our house.  The more used ones have been stuck in the fridge door for years!  I thought it would be a great idea to have something concrete to pass on to my children, just in case they would be interested in baking in the future.  Another thought was to share them to the rest of the world, in particular, to those who have faithfully followed me through the years, trying one recipe after another, sharing cake photos, and giving me feedback or telling me of their experiences.

So finally, I finished it!  An eBook containing the most popular chiffon cake recipes from this blog PLUS more new ones.

Front cover

I am very happy with the way the book turned out.  It does look like it was very professionally-made.  In the near future, I will have this printed into an actual book.  But for now, the eBook will suffice.

To see a preview of the eBook, for more information about it and how to purchase it, please click here or on the image link at the sidebar.

Here's hoping for your kind support.  Please help me spread the word! Thank you!

Wednesday, July 3, 2013

Speculoos

What is the fuss about this stuff?  I just want to know. 

The supposedly famous cookie butter isn't available in supermarkets here so it wasn't that easy to research.  Surprisingly, I found the dutch spiced cookies.


I am not a big fan of anything spiced but these cookies were alright I guess.  It's not something I would think of buying again though.  No one else was attracted to it in our household.  Perhaps it was the foreign sounding name or the word 'spiced' that scared them off.

I found the bottled cookie butter online, in a Dutch shop.  The original Speculoos cost me $7.65 while the crunchy one, a bit more at $8.65.  Plus I had to pay for shipping.  Pricey compared to similar sized peanut butter or Nutella.  Curiosity can be expensive, don't you think so?


I had an initial taste with a teaspoon.  Yum, I liked it.  But the next day, I tried it on bread and it absolutely didn't work for me.  Cookies in a sandwich doesn't cut it for me. Yeah, peanut butter or Nutella still wins.

Next, I made some Speculoos macarons.  They looked really beautiful and enticing. I figured that if I put this thing on macarons, my kids would devour them.  


I was wrong....my youngest son didn't even bother going anywhere near it when I told him what it was.  The macarons did get eaten eventually.  Slowly.  I had to ask my daughter to bring some to school to give away. 

A friend suggested speculoos ice cream.  That was a great idea as I've been making ice cream constantly this past month or so.  Even though it's winter here. 


This thing was soooooo creamy.  I could not eat more than one scoop at a time.  Usually, a batch of homemade ice cream (about 1.5 liters) lasts no more than 2 days in our house.  This speculoos ice cream has been in the freezer for about a week.  It is nearly finished now.  Just like the macarons, it is going ever so slowly.

So again, what's the fuss about speculoos?  You tell me.

Monday, June 17, 2013

Angel Food Cake

Three weeks ago, I decided to stop selling cakes.  You might think that was really crazy of me to do BUT the thing is, I am just plain tired. I just wanted to get away from the pressure and stress for a while.  For how long, I don't know.

I kind of shocked and disappointed the people around me, especially the ones who regularly asked me to make cakes for them.  They thought something bad had happened.  That I was sick or had a problem.  Someone even thought I was pregnant!  It was difficult for them to understand that I just wanted some time off and that this wasn't a decision I made out of impulse. They were hoping this break wasn't going to be a permanent thing.

That's something I couldn't promise.  Because you know what? I don't miss it.  I don't miss the constant ringing of my phone.  I don't miss the late nights.  I don't miss the people going in and out of my house.  I don't miss the nonstop baking and cleaning up. I don't miss the cakes, period. 

I still bake though.  But only what I want to and when I want to.  For my family this time. Although I have been constantly baking bread and whipping up ice cream, for the last three weeks, I had avoided anything that had to do with cake.  Honestly, I didn't have the slightest desire at all.

Today, however, I was compelled to make one. With the ongoing ensaymada experimentation, I had a growing number of spare eggwhites that I didn't want wasted.  So I made an angel food cake. The recipe I used is another one that I copied off my aunt's old notebooks.


I know the cake isn't much to look at. Don't let the brownish, flawed outside appearance fool you.


What more can I say?  Eggwhites well used.  


ANGEL FOOD CAKE (suitable for a 10x4 tube pan)

Ingredients:
1 1/2 cups egg whites, room temperature
1 1/2 cups white granulated sugar, divided
1 1/2 teaspoons cream of tartar
1/4 teaspoon salt
1 cup cake flour
1 teaspoon flavouring of your choice (ex. vanilla, almond)

Procedure:
1. Preheat oven to 180 degrees C.
2.  In a small bowl, sift together the cake flour and 3/4 cup of the sugar.  Set aside.
3.  In a large mixing bowl, beat eggwhites, cream of tartar and salt till frothy. Gradually add in the remaining 3/4 cup sugar and the flavouring and beat until stiff.
4.  Gently fold in the cake flour/sugar into the meringue 3 tablespoons at a time.  Fold only until the flour/sugar mixture disappears.
5.  Pour batter into an ungreased 10x4 tube pan.  Push the batter to the sides of the pan and level off.
6.  Bake for about 40-45 minutes or until a skewer inserted into the center of the cake comes out clean.  Cracks should feel dry.
7.  Take out of the oven and immediately invert onto a glass bottle and cool completely.


 8.  Carefully loosen cake sides with a knife and invert cake into a serving plate.  Enjoy as is or with whipped cream, ice cream or fresh fruits!


Tuesday, June 4, 2013

French Macarons

I had a love affair with macarons not too long ago.  But sadly, that quickly died.  I realized it wasn't really the macarons I was in love with it.  It was just all about the challenge.  Once I found the recipe that gave me consistent results and I got used to the technique, the excitement was gone.

Excited or not though, if one has an excessive amount of eggwhites to spare, there is no reason not to make macarons, is there?

Basic French macarons dusted with cocoa powder and filled with Nutella
As it has been a long while since I last made them, I wasn't quite sure I still knew how!  Lots of people have been asking me to share the recipe that I use.  I have been apprehensive to do so because I believe that a good recipe is just one small factor in successful macaron making. What works for me will not necessarily work for everyone else.  There are a whole lot of other factors involved like mastery of technique, the weather, your oven, etc.


Since I am far from being a macaron expert and cannot give definite pointers myself, I suggest that before embarking on this endeavor, especially if it is your first time, for you to read a LOT about macaron making, watch videos, and compare various recipes.  Although I bought so many books on macarons, I found this and this as the most informative as far as tips, tricks and troubleshooting are concerned. This video helped me as well.

Lastly, I cannot stress enough how important practice is.  Do not be discouraged if your macarons do not turn out right the first, second or third time.  Most people make batches and batches before they are able to perfect it. I know I did!

Although majority of bakers would probably say that the Italian meringue method is more foolproof than the French, I still prefer the latter. The recipe below has worked very well for me in my own kitchen.  I hope it will for you too!  (I'm sorry I did not include a recipe for the filling. I will leave that up to you, ok?)

BASIC FRENCH MACARONS
(makes 40-45 filled macarons)

215 g almond meal
215 g pure icing sugar
Pinch of salt
150g eggwhites (aged for at least 1- 2 days)
100 g granulated sugar
5g powdered eggwhite
1/2 tsp cream of tartar

Place almond meal, icing sugar and salt in a food processor and process in short pulses until finely ground. Sift mixture into a bowl.

Combine granulated sugar and powdered eggwhite. In a medium bowl and at medium speed,  beat eggwhites and cream of tartar until foamy. Gradually add in the sugar/powdered eggwhite then beat mixture at high speed until stiff.

Using a spatula or a scraper, fold in the almond meal/icing sugar into the meringue.  Cut into the meringue then fold up and over. Make sure to scrape the sides and bottom of the bowl. Once the batter falls back into the bowl in a thick ribbon, it  is ready to be piped.

Line 3-4 baking trays with baking paper. Place template under baking paper of one sheet. (Download a TEMPLATE such as this.) Fill a piping bag fitted with a 1/2" plain round tip with the macaron batter. Pipe rounds onto the baking tray using the template as a guide. After piping, carefully pull out the template.


Tap the baking tray onto the counter a few times to break any bubbles and to help the macarons settle.  Do the same for the other baking trays.

Let the macarons rest for about 30-60 minutes or until the tops are quite firm and dry to the touch.

Preheat oven to 180 degrees C. Right before putting a baking tray in, lower the temperature to 155 degrees. Bake 10 minutes then turn the tray around.  Bake for a further 8-10 minutes.  Remove the tray from the oven and let the macarons cool down for a few minutes before peeling off from the baking paper.

Before putting the next tray in,  bring the oven temperature back up to 180 degrees.

Sandwich cooled macarons with your desired filling.

Have fun and good luck!

Thursday, May 16, 2013

Strawberry Shortcake

In the Philippines, particularly in Metro Manila, it seems that many bakers selling from home have emerged in recent years.  Oh, I am not talking about just any baker and not just any home.  A lot of these homebakers are high society matrons who reside in the plush subdivisions of the metro.  Each Mrs. seems to have her own specialty such that Mrs. X is known for this cake, Mrs. Y is known for another cake and so on.  The system of ordering is simple - give them a ring to order, then on pick up day, you go to their house and a uniformed maid comes out the door to hand you your cake.  As you would expect, these cakes are more pricey than those bought at the big bakeshops and only those from the middle and upper classes could afford them.

One such lady baker is Mrs. Yulo.  To be honest, I don't really know who she is, but I do know that the Yulo surname = elite.  Mrs. Yulo's specialty, apparently, is the strawberry shortcake.  I say apparently because I have only read about it. I wonder if she herself bakes the cakes? I can only imagine an army of helpers around the kitchen who actually do the work for her! I have read about how great this cake is, how Mrs. Yulo uses imported strawberries and cream, and stuff like that. Her cake was even listed among the 10 best desserts in Manila (article written way back in 2005, but still).

Image credit: En Route
I have no way of knowing for sure.  But this is what I have gathered from the internet and what I have deduced just by looking at photographs.  My deductions may be wrong though.

Image credit, from top L clockwise: The Moving Couch Potato, SpotChuvaness, The Moving Couch Potato
1.  The cake is baked in a tube pan as there is an obvious hole in the middle. People say it is a sponge cake but I say, it is probably chiffon.
2.  The cake is frozen.  I've seen pictures with the strawberries either all icy-looking or at the point of thawing that they are already bleeding.
3.  The cake is very tall.  Chiffon cakes do bake tall in tube pans but what makes the assembled cake even taller is the amount of cream in between the cake layers and on top.  In some photos I've seen, the filling is as thick as the cake layer!
4.  There is nothing extraordinary with the way the cake is presented.  Just a pinkish cream with strawberry bits all over and 8 half strawberries around the edge.

My conclusion?  Unless Mrs. Yulo uses a special, secret ingredient, I see no reason why this cake cannot be replicated at your own homes.  If you have tried any of the chiffon cake recipes here and were successful, you will find this strawberry shortcake quite easy to make.  It is very similar to the Mango and Cream cake, basically just replacing the mangoes with strawberries. Simple but outrageously delicious.

Below is my strawberry shortcake.  I have arranged my photos in a collage similar to the one I have done with Mrs. Yulo's cake so you can see how twin-looking they are!


Now let's look at the comparison more closely, shall we?


So...would you rather spend a hefty amount of money buying this cake or would you dare try making it yourself?

STRAWBERRY SHORTCAKE

VANILLA CHIFFON CAKE (recipe suitable for a 9x3 tube pan)

{A}
1 cup plus 2 tablespoons sifted cake flour
1 ½ teaspoons baking powder
½ teaspoon salt
6 tablespoons white sugar

{B}
¼ cup corn/canola oil
4 egg yolks, from large eggs, at room temperature
1/3 cup water
½ teaspoon vanilla extract

{C}
4 eggwhites
¼ teaspoon cream of tartar

{D}
6 tablespoons white sugar

Procedure:
1. Preheat oven to 175 degrees Celsius.
2. In a large bowl, combine {A} well. Add in {B}. Beat with electric mixer or by hand until smooth and well blended.
3. In a separate bowl, beat {C} on high speed until frothy. Gradually add in the sugar {D} and beat until stiff peaks are formed. Gradually and gently fold in egg whites into egg yolk mixture. Pour batter into an ungreased 9" tube pan.
4. Bake for about 55 minutes or until top springs back when lightly touched. Invert pan onto a glass bottle immediately and cool completely.
5. To release cake from pan, carefully run a thin knife around sides of pan and invert cake onto a large serving plate. **Tip: For easier handling, wrap your cake very well in cling film, then refrigerate overnight before frosting.

Strawberry Whipped Cream Frosting:
2 cups whipping or thickened cream, very cold
1 250g bar of cream cheese, soft but still cold
1/2 cup sugar
1 teaspoon strawberry extract/essence
a drop or two of red liquid food coloring
150g of strawberries, plus 8 pieces (preferably big ones) more for garnishing

*Make sure your mixing bowl and beaters for the whipped cream are all well chilled to achieve better volume.

Process the strawberries until they are turned into small bits. Do not puree.  Set aside.

In a small bowl, beat the cream cheese until smooth.  Set aside.

In your chilled bowl and using clean beaters, beat the whipping cream, sugar, strawberry extract and food coloring until the mixture is quite stiff. Gently fold in the cream cheese then beat again at high speed for a few seconds or just until everything is well combined.  Be careful not to overbeat.  Carefully fold in the strawberry bits.


To assemble:

Cut the vanilla chiffon cake horizontally into three layers.

Place bottom cake layer (the wider end) on your cake board, cut side up. Spread and level some of the whipped cream onto the cake layer until it is about 1/2" thick.  Cover the hole as well. Place the next cake layer over the bottom layer and spread whipped cream in the same manner. Top with the last cake layer then frost the cake all over with the remaining whipped cream. Garnish the top with the strawberry halves.

That's it! Go ahead and give it a go.  You won't regret it.