Wednesday, October 27, 2010

Still watching over me

Most of you already know that my mother passed away in early 2009.  October 27 last year, on the occasion of her birthday, we had a very simple celebration to remember her by.  That day was the day I baked my very first batch of red velvet cupcakes.  Everyone in the family loved this new thing.  Little did I know that those cupcakes would change the course of my life in the coming year.

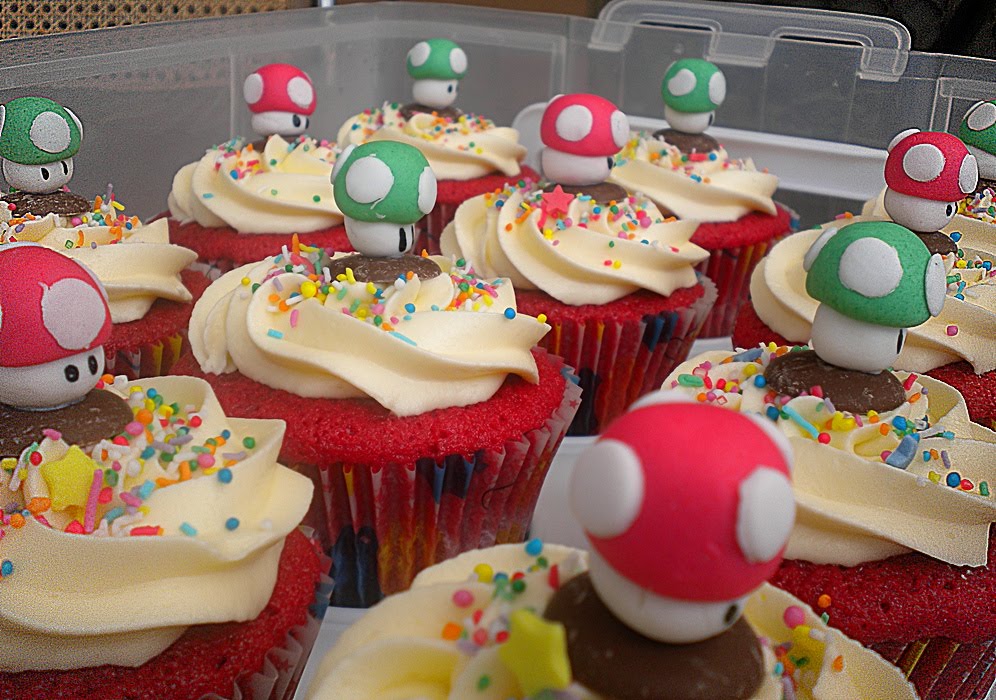
After I gave boxed red velvet cupcakes as presents last Christmas, my family and friends were quite impressed that they began urging me to start a home-based cupcake business.  I was hesitant of course...I didn't have the confidence nor the skill to bake for people other than my family.  My sister in-law gave me a needed push by handing me my very first cake order.  That was around January.  Since then, I've gotten 24 more...first from just friends, then from friends of friends, and on few occasions, from someone I didn't even know.  Not bad. 

My confidence level is still low though. I tend to look at photos of other people's cakes and then frown upon mine.  There is certainly still so much more to learn and improve on.  What keeps me going is the belief that home-baking is always best.  And even if my cakes and cupcakes do not look as professional as those from the bake shops, the homemade goodness does speak for itself.

It was not a coincidence that this all started on my mother's birthday.  She's still watching my back...from up there.  I will forever be her little girl.


I know that she's pleased that after years and years of searching for what I wanted to do with my life, it certainly looks like I finally found it. 


The cake's for you, mom.  I love you. Thank you for watching over me.

Monday, October 18, 2010

No-fuss (and absolutely delicious!) Banana Loaf

I was not really in the mood to bake today but I had 3 over ripe bananas that I didn't want to go to waste. Thought I might as well do something with them.

I actually use the following recipe for my banana cupcakes but this time, I tried loaves instead, just for a bit of change. I also added some chopped pecans and chocolate chips on top to dress it up a little.

It didn't look pretty as a whole loaf...


but when I sliced it...just lovely...


My daughter couldn't stop eating them.  And one of my friends, to whom I shared one loaf, immediately sent me a text message as her family was snacking on the cake.  They loved it so much she wanted to order some...

No kidding.  For something so easy to make (no mixer needed), it's seriously good.  I also love this recipe because the resulting banana cake is really soft and cakey rather than the usual heavy and dense.


Ready to try it?  The recipe yields two large loaves but as cupcakes, would make about 24 to 30.

BANANA LOAF

Ingredients:

3 cups plain flour
1 1/2 teaspoons baking powder
1 1/2 teaspoons baking soda
1 1/2 teaspoons salt
2 cups sugar
1/2 cup vegetable/canola oil
3 large eggs, room temperature
1 teaspoon vanilla extract
1 cup buttermilk *
1 1/2 cups banana puree**
optional: 1/2 to 1 cup chopped pecans or walnuts
              1/2 cup chocolate chips

*to make homemade buttermilk: In a measuring jug, put 1 tablespoon vinegar or lemon juice, then add enough milk to make 1 cup.  Leave for about 15 minutes until thick and curdled.
**mash about 3 medium-sized over ripe bananas with a fork or in food processor (I prefer it really smooth)

Procedure:

1. Preheat oven at 180 degrees C. Prepare 2 large loaf pans (28cm) by lining bottoms with baking paper. Note: I do not really find greasing the pans necessary.
2. Sift flour, baking powder, baking soda, and salt together in a medium bowl. Set aside.
3. In a large bowl, combine sugar and oil. Add eggs one at a time, beating well after each addition. Mix in vanilla extract.
4. Mix in flour mixture and buttermilk alternately, in three batches, just until combined. Do not overmix.
5. Fold in mashed bananas.
6. Divide batter equally into prepared pans. Top with chopped pecans and chocolate chips, if using.
7. Bake for about 50 minutes or until skewer comes out clean when inserted into cake center.
8. Cool in wire racks before slicing.

Enjoy!

Tuesday, October 12, 2010

Happy birthday Matthew!

Today is my youngest son's birthday.  Even at 9, Matthew remains the "baby" of the family.  Everybody still dotes on him (especially me) and I think, that will forever be the case.

We celebrated Matthew's birthday two days early (on Sunday) and invited a few family friends over.  We gave him his present in advance as well, so he can assemble it and play with it with his friends on the day. 

For the occasion, I prepared a simple mocha chiffon birthday cake with a Super Mario edible icing image.


In the Philippines, mocha cake, along with vanilla and chocolate, are traditional for birthdays.  But while mocha flavour is mostly synonymous to a combination of coffee and chocolate, the Filipino version is just coffee.


My daughter and I made a piƱata dedicated to our favourite AFL club (which incidentally won the premiership flag just over a week ago!).  The kids went crazy grabbing the most lollies for themselves.


Today, being a school day, my son went to school bringing a giveaway for his classmates.  I didn't want him handing out the usual lolly treat bags, so I made something different this year.

I found the idea of lollipop cupcakes in this book.  I followed the vanilla cupcake recipe and the resulting mini cupcakes turned out as I like it, soft and moist.  However, because they were soft, the lollipop sticks went right through the top of the cupcake. 

To solve this problem, I had to think of a way to strengthen the cupcake top.  I melted some chocolate (I only had white), then I dipped the tops of the cupcakes into it and next into a bowl of 100s and 1000s.  I let the chocolate set in the fridge for a few minutes.


Before inserting the lollipop sticks into the cupcakes, I also dipped the ends into the melted chocolate.  This process more or less sealed the holes on the cupcake bottom where the sticks were inserted.


I let the lollipop cupcakes chill again for a few more minutes before wrapping each in a piece of cling wrap then finally finishing it off with a ribbon.


What do you think?  Aren't those great?  I am really hoping my son's friends will enjoy this unique treat.  Hopefully, too, I have given you a new idea to use for your kid's next birthday party!

Have a great day!

Saturday, October 2, 2010

Dulce de leche cake

A friend of mine from way back my university days (whom I haven't seen in like 13 years!) was in town with her son this past week. We invited them over for lunch today before they headed back to Brisbane.  I know I said I would be resting from baking for a bit but then I wanted to prepare something quite special for them.

I searched the net for cake ideas and this kind of cake caught my fancy.  I've not made dulce de leche ever before but since I had sweetened condensed milk in my pantry anyway and it seemed easy to follow the instructions on how to make one, I decided to give it a go.  My son was teasing me, saying I was out to impress my friend.  If I had really wanted to impress her, I would have stuck to a cake I was already used to making, but I was actually setting myself up for failure here by experimenting on a new thing.  In the end, the risk was all worth it.

Here's my version of the Dulce de Leche Cake....layers of chiffon cake, filled with creamy custard, frosted with dulce de leche swiss meringue buttercream, sides covered with toasted cake crumbs, topped with dulce de leche and chocolate clusters...


Too many components in this cake, you reckon?  Next time I just might omit some of them, like maybe the custard filling.  My custard was actually a little runny and some of it absorbed into the cake. 


But let me just say that the dulce de leche was fantastic!  And adding a mere half a cup of that stuff to the Swiss meringue buttercream did wonders to the frosting.  Nothing like I've ever tasted before. Certainly a good result for a first try.

Have a great weekend!

Tuesday, September 28, 2010

A Week-long of baking

I had a wonderful week of preparing four cakes.  It was surprising to receive one order after another and I consider that a great blessing.  Three of the cakes had chocolate chiffon bases but had varying fillings and frostings.

First one was for my husband's workmate's birthday.  This is the fourth cake their office has ordered from me within a few months.  I was told this was the best so far.  The hero in this cake is really the wonderful frosting. 

Chocolate chiffon with Strawberry Whipped Cream Frosting and Filling

I learned how to fan the strawberry from the show Junior Masterchef!
Up next was another Ube Macapuno Cake.  This kind of cake is fast becoming my signature cake!  I have made this more times than any other cake in the recent months.

Instead of making a 9" round, 3-layered cake,  I made a 10" round, 2-layer one which was just as good.
Third cake was for my son's friend's 9th birthday.  The boy loves Pokemon, hence, the cake topper. I love this one because it is very clean and simple.  And of course, the Chocolate Swiss Meringue Buttercream is so, so good.


Last cake, which I finished just today is frosted this time with Vanilla Swiss Meringue Buttercream.  The one who ordered this requested for flower decorations and nut topping.  I used toasted macadamia nuts...I think I may have just overdone it a bit....let's just hope they like macadamia...


I moulded the gumpaste roses a few days ago.  They turned out quite well despite the fact that I opted not to use any flower cutters or forming tools.


Well, that's it for my cakes.  I hope to take a break from baking for a while unless another order comes in soon.  That is most welcome of course....

Saturday, September 18, 2010

Super Mario character cupcakes

A family friend's son is having his 7th birthday party today. The parents had earlier ordered a Super Mario themed birthday cake from the local bakeshop but had later decided they wanted cupcakes for the party as well. Yesterday, at the last minute, the boy's mom asked me if she could order 24 red velvet cupcakes from me, preferably with the mushroom character from Super Mario as topper. Given the short notice, I really wanted to decline but I just couldn't and didn't have the heart to. You see, the birthday boy has actually become quite close to me as he rides with us from school everyday and I wanted him, of course, to have a fun party. So yeah, I said yes.

Frankly, I had no idea what to do. I thought I could model the figures with gumpaste but then, given my poor knowledge in this area of cake decorating, how could I pull it off in so short a time? I tried to remember a few techniques I have learned from my frequent visits to cake decorating websites.

Luckily, I had some coloured gumpaste ready, plus I had the tools needed. Yesterday afternoon, in between doing the laundry, picking my kids up from school and feeding them, I came up with these...


The mushroom figures actually turned out pretty straightforward to do. Not perfect, I know, but then, I didn't expect perfect. Early this morning, I baked the cupcakes and before lunch, had all of them frosted, done and ready to go! 


I could only hope the birthday boy likes them. As for me, it was a pleasure making the toppers. I always enjoy learning something new.

Tuesday, September 14, 2010

Project: My recipe journal

When it comes to my cooking, my kids are my biggest fans. Although I do not cook anything fancy, they nevertheless look forward to most meals because they know I would cook up something they would love to eat. And the dessert...that makes them even happier. One of the things I would want to pass on to them are, of course, the recipes. I would love for my children to learn to cook the food that they grew up with and be able to share them with their own families in the future.

For this reason, I have started an important project...my recipe journal. At the moment, the recipes I use are all over the place -- in cookbooks, computer printouts, handwritten notes, etc. My dream is to have a single compilation of my family's most loved recipes. It would include recipes that have been handed down to me as well by my own mother and my aunts.

I would like it to be very personal. It is certainly much easier to type up the recipes on the computer but I would rather have them handwritten. So when my children would read through the recipes, they would have memories not only of the food but of me.

Today, I bought myself a hardbound notebook and then I dressed it up with my fabric journal cover.
 

I purchased the fabrics from Spotlight a while back. You've seen glimpses of them in my patchwork zippered pouch but this recipe journal is a more suitable use for them.


I haven't started writing a recipe down yet. I have to do this with patience to make sure it will be a beautiful legacy. The first page I will be reserving as a dedication page so my kids will know that this was lovingly done for them.

Can't wait to get this project going.